


Dreamscaping in 3D: Using AI to Reimagine 3D Space
AI-Driven Environment Design Lookdev using AI-Generated 360°

💡 This post documents exploring a workflow:
Using AI to generate 360° concept images from my own 3D scenes—then projecting them back into the environment for visual ideation and iteration.
Introduction
The Puzzle
As I explore how to leverage generative AI in my work, one puzzle kept nagging at me: How do I narrow the gap between beautiful 2D AI-generated concepts and the 3D environments I actually build?
Most AI concepts are visually stunning. But I always found myself thinking, "I want to see what this would feel like if I were standing inside the space, at eye level, right now." If I couldn't bridge that gap, those images would stay as inspiration only. They might look amazing, but once applied, they could easily lead to that familiar moment: "It feels different from the image."
I tried using generative 3D tools, but most of them focus on single assets like a chair, a building, or a tree. That wasn’t enough for someone like me, who art-direct entire scenes, not just individual objects.
So I stepped back and reframed the problem: Instead of forcing AI to generate 3D, what if I used its strength in 2D image generation—captured in a format that maps spatially back to 3D?
That’s when I started exploring 360° image generation.
The Idea
After some early experiments with AI-generated 360° images, things started to click. My past trials—ComfyUI workflows, AI texture generation tools like StableGen and Comfy Textures, and Jussi Kemppainen’s techniques—suddenly aligned.
Then it hit me:
What if I rendered a 360° view of my 3D scene, used that as a ControlNet input to generate an AI-enhanced version, then projected that result back into my 3D scene using spherical mapping?
With that loop, I could instantly visualize the AI-enhanced environment in real-time 3D—finally closing the loop between ideation and spatial experience.
Workflow
The Focus
Let me clarify what I was testing. Could this workflow accelerate material and texture art direction using generative AI, while preserving spatial structure and object placement? Can GenAI help me reimagine my scene’s concept quickly and effectively?
This experiment wasn’t about generating entire 3D environments. It was about testing a fast visual prototyping method that connects 2D AI generation with 3D spatial experience. I wanted to iterate within a focused range—specifically texture, material, and lighting variations—while keeping the overall composition of walls, floors, furniture, and objects intact.
1. Preparing the 3D Base Scene
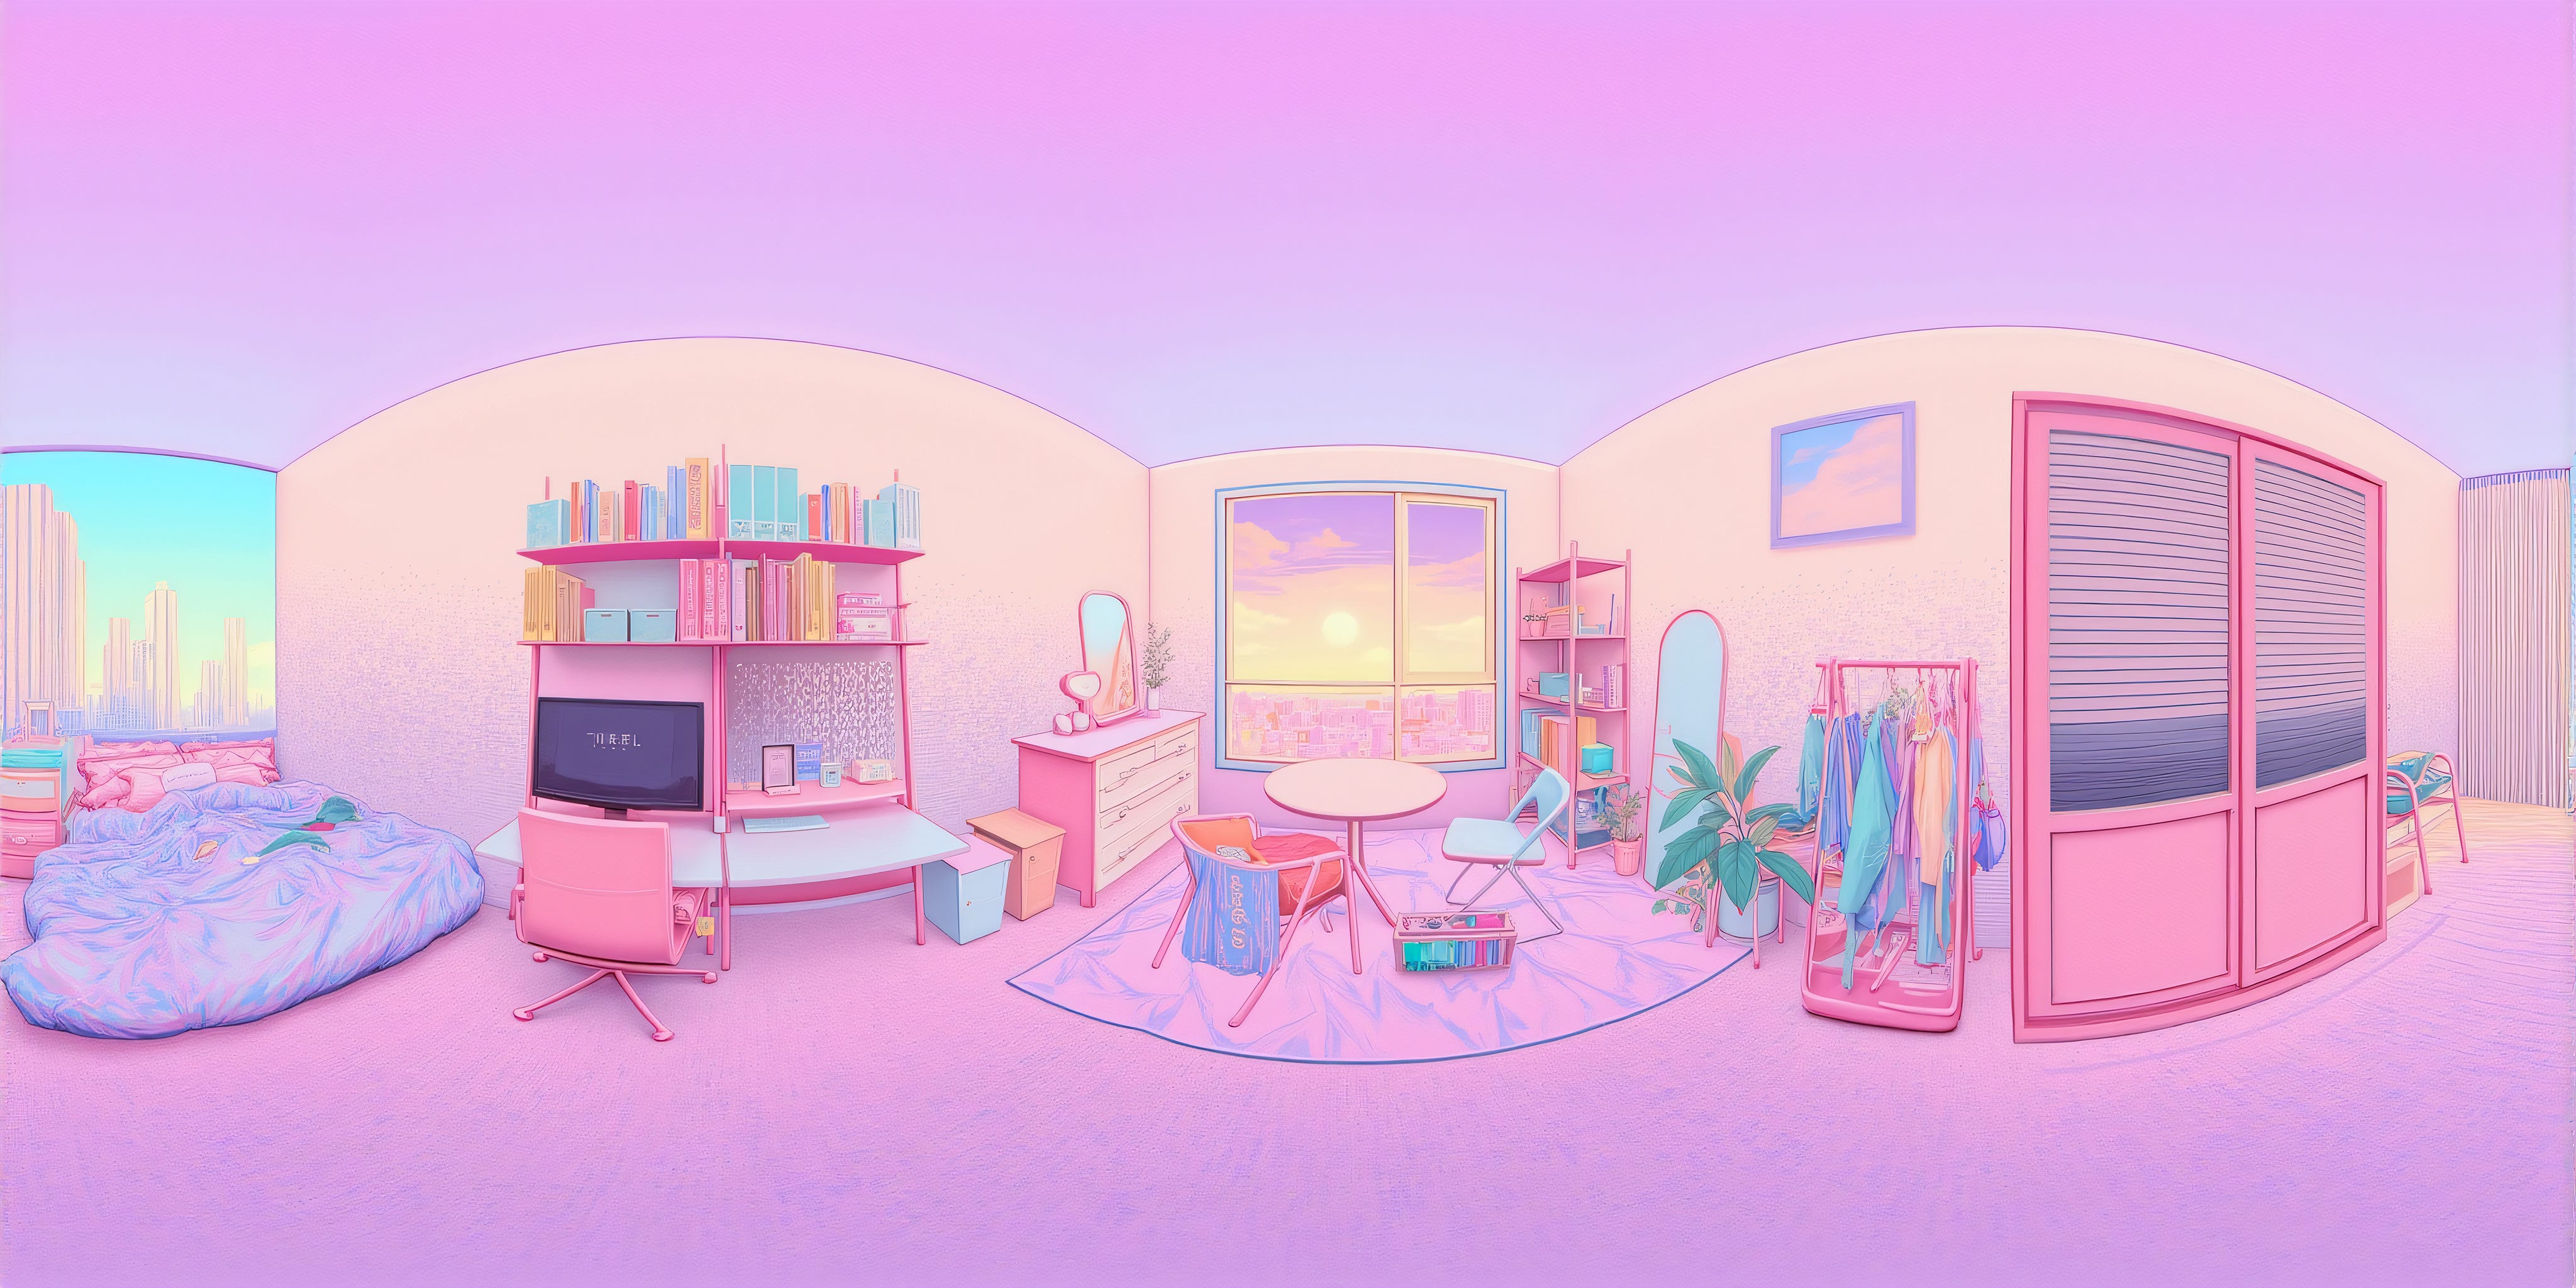
For the starting base 3D scene, I took the studio apartment 3D environment from my portfolio. The key to this preset environment is having a clean base 3D scene that will generate a 360° image to serve as clean input for ControlNet.


I set all materials to light grey matte with no textures and deleted small details like jewelry. I also set ambient lighting to evenly illuminate the space, and disabled the 'Cast Shadow' property on all light sources to prevent objects and furniture from casting shadows. Removing shadows turned out to be especially important. It helped generate a cleaner ControlNet conditioning input and made it easier to produce different lighting variations in the next step.
2. Render a 360° Panorama of the 3D Base Scene in Unreal Engine
From the cleaned-up base scene, I rendered a 360° panoramic image in Unreal Engine to use as input for ControlNet in the next step.
There are several ways to render 360 panoramas in UE, and I tested a few options, including Movie Render Queue and custom plugins. I ended up choosing the Panoramic Capture plugin because it allowed me to export as many passes as possible. I wasn’t sure yet how I’d be using the image in ComfyUI, so I wanted flexibility.
To render, I followed this official guide: Panoramic Capture Tool Quick Start – Unreal Engine
1. Enable the Plugin

From the Plugins menu, enable the Panoramic Capture plugin and restart the editor.
2. Place the BP_Capture actor

At the Content Drawer, and browse to PanoramicCapture Content > Asset. If you cannot find this folder, enabled the “Show Plugin Content” option in the View Options.
Place the BP_Capture blueprint into the scene.
3. Set up Render Passes

Click Edit BP_Capture in the Outliner to adjust its setting. This document explains what is inside of the BP_Capture blueprint, what are the parameters.
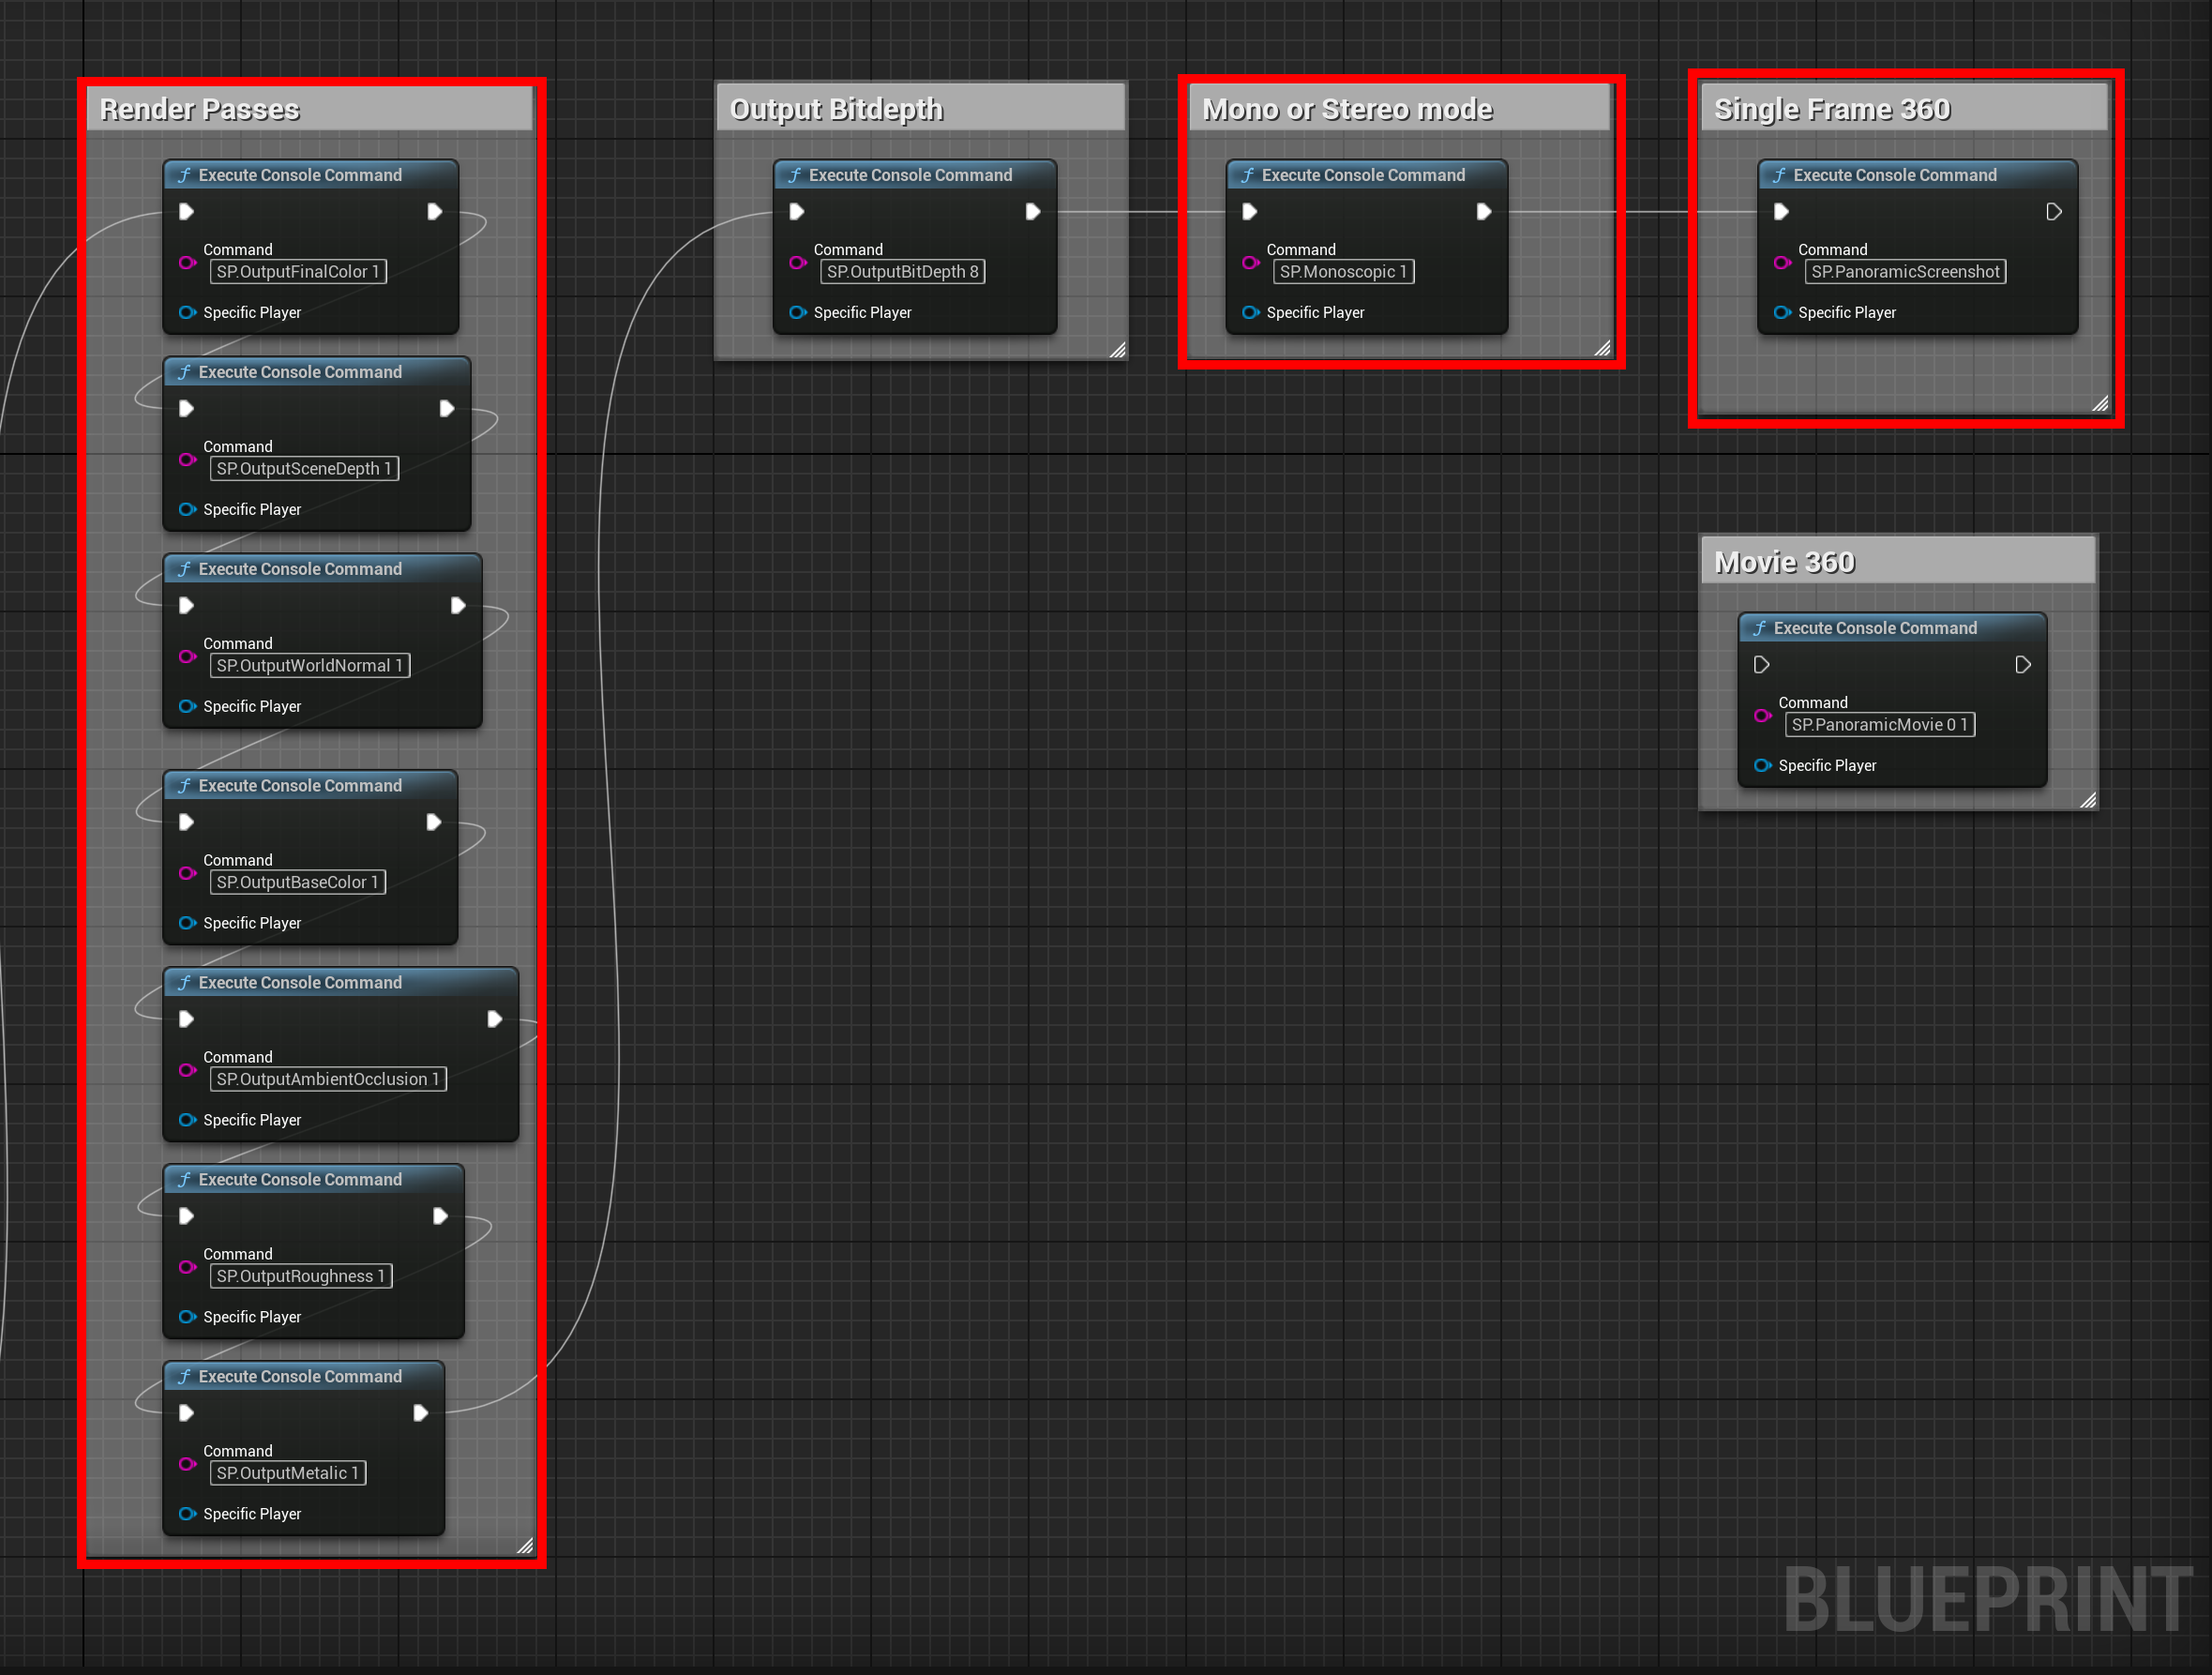
Inside the blueprint, I enabled console commands to activate all available passes for testing: Final Color, AO, Normal, Roughness, Metallic, BaseColor, and SceneDepth. I also set SP.Monoscopic to 1 and connected it to Single Frame 360 to render a still image.
4. Start Capture

Click Play in the toolbar to trigger the capture process.
When it’s done, the output images are saved in C:\PanoramicCaptureFrames.
Output Samples
Below are examples of what I got.
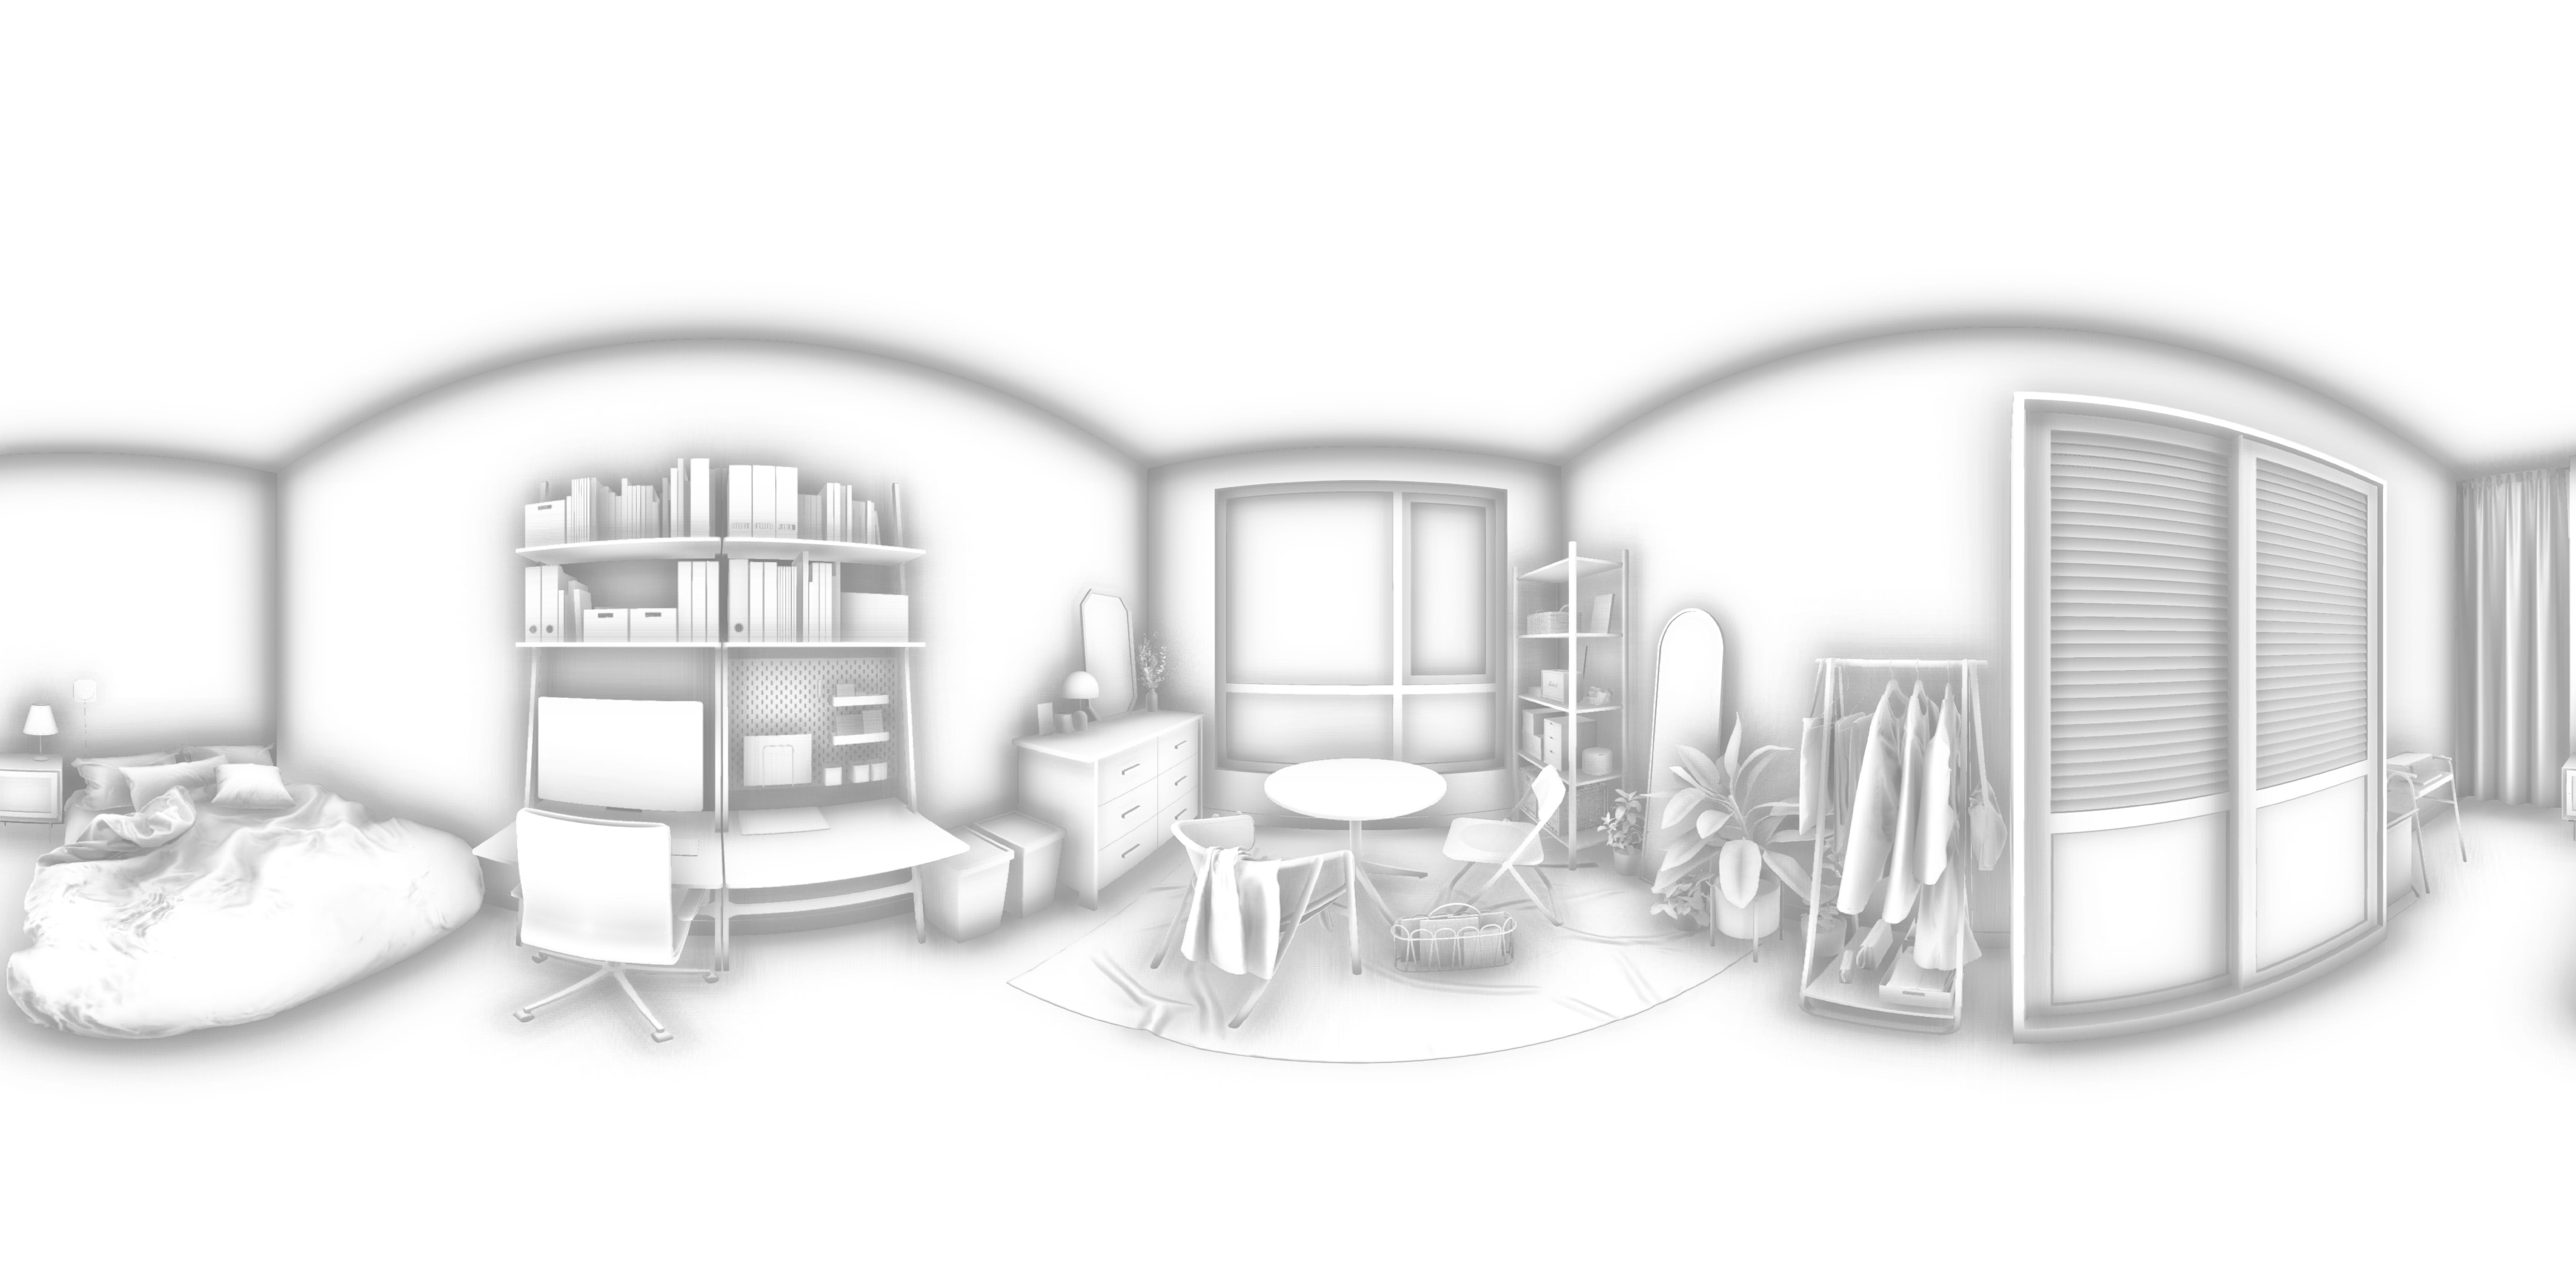


I also rendered Base Color, Roughness, and Metallic passes, but since they were all flat, single-color images in this scene, they weren’t helpful. That said, these passes could still be used creatively as ID maps. For example, you could assign different roughness values to walls, floors, or furniture, and then use the roughness pass as a mask.
It might also be worth exploring 360 render plugins that work with Movie Render Queue and support custom material IDs. I didn’t go that far this time since I wanted a quick result, but it’s something I plan to test later.
3. Generate AI Variation Using ControlNet in ComfyUI
Tried World Normal
I brought the 360 render into ComfyUI and plugged it in as a ControlNet input. The first thing I tested was using the world normal pass with the normal ControlNet model, but I didn’t get great results. This was likely because ControlNet’s normal model expects tangent-space normals, not world-space normals. If anyone has tips on how to use world-space normals effectively in ComfyUI, please let me know!
Using Midjourney Retexture to Generate Style Inspirations
I tried using Midjourney’s retexture feature since it’s often easier to get a clear aesthetic direction there compared to Stable Diffusion. But the results changed the layout and geometry too much, so I didn’t end up using them directly. Instead, I used some of them as IP-Adapter inputs in ComfyUI for style reference.

ComfyUI Workflow
My workflow was fairly simple. I started with a workflow from deimose411 for generating 360 panoramas in Stable Diffusion, and customized it by adding ControlNet and IP-Adapter.

I used ControlNet to preserve the structure and layout of the original 3D scene, and IP-Adapter to guide the style and material look based on reference images. For ControlNet, I used the Canny model.
If you’re new to ComfyUI, I recommend starting with deimose411’s blog post. It covers everything from installation to 360 image generation and upscaling.
For this experiment, I generated images at 2K resolution and used a separate upscaling workflow to bring selected outputs up to 8K.
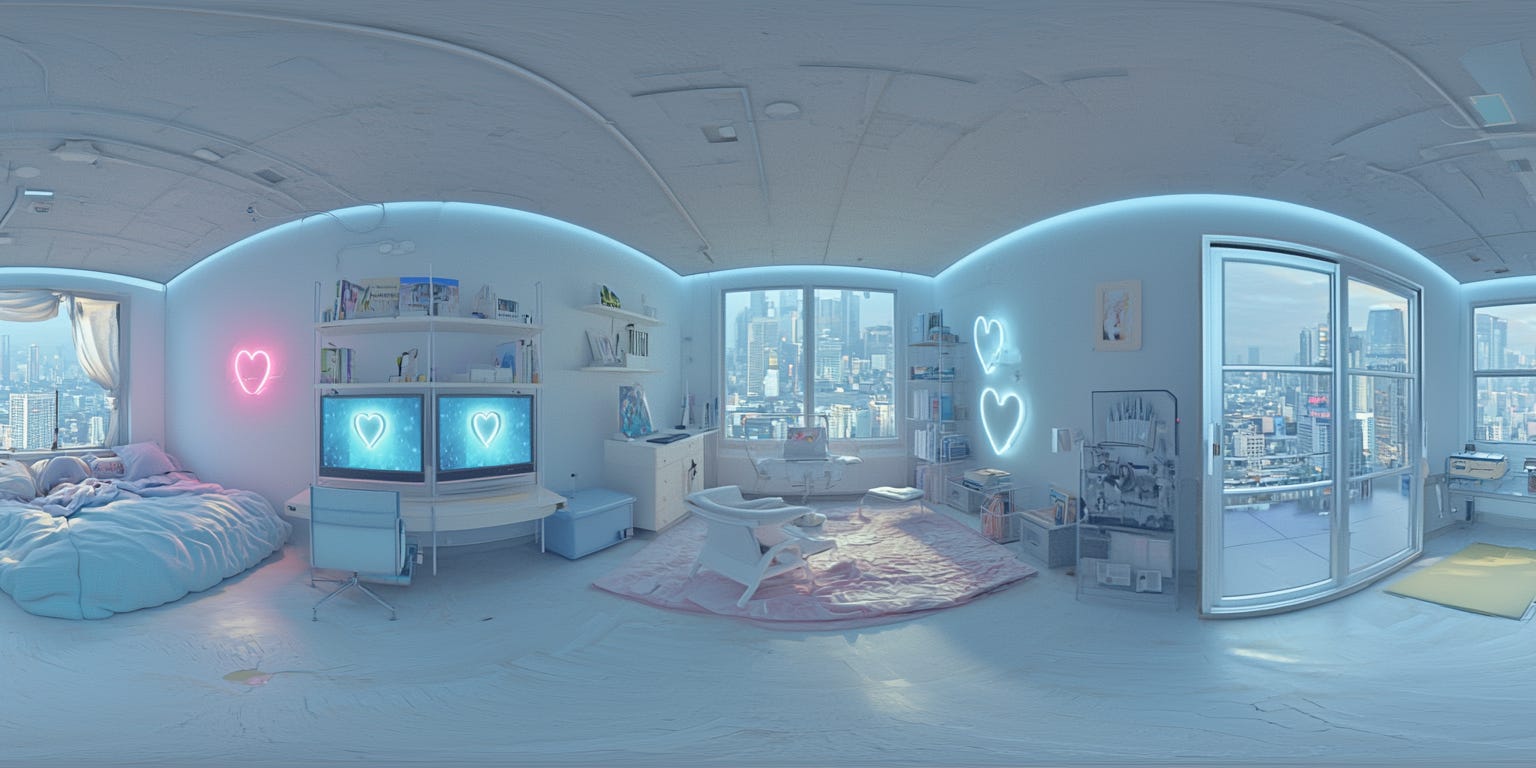
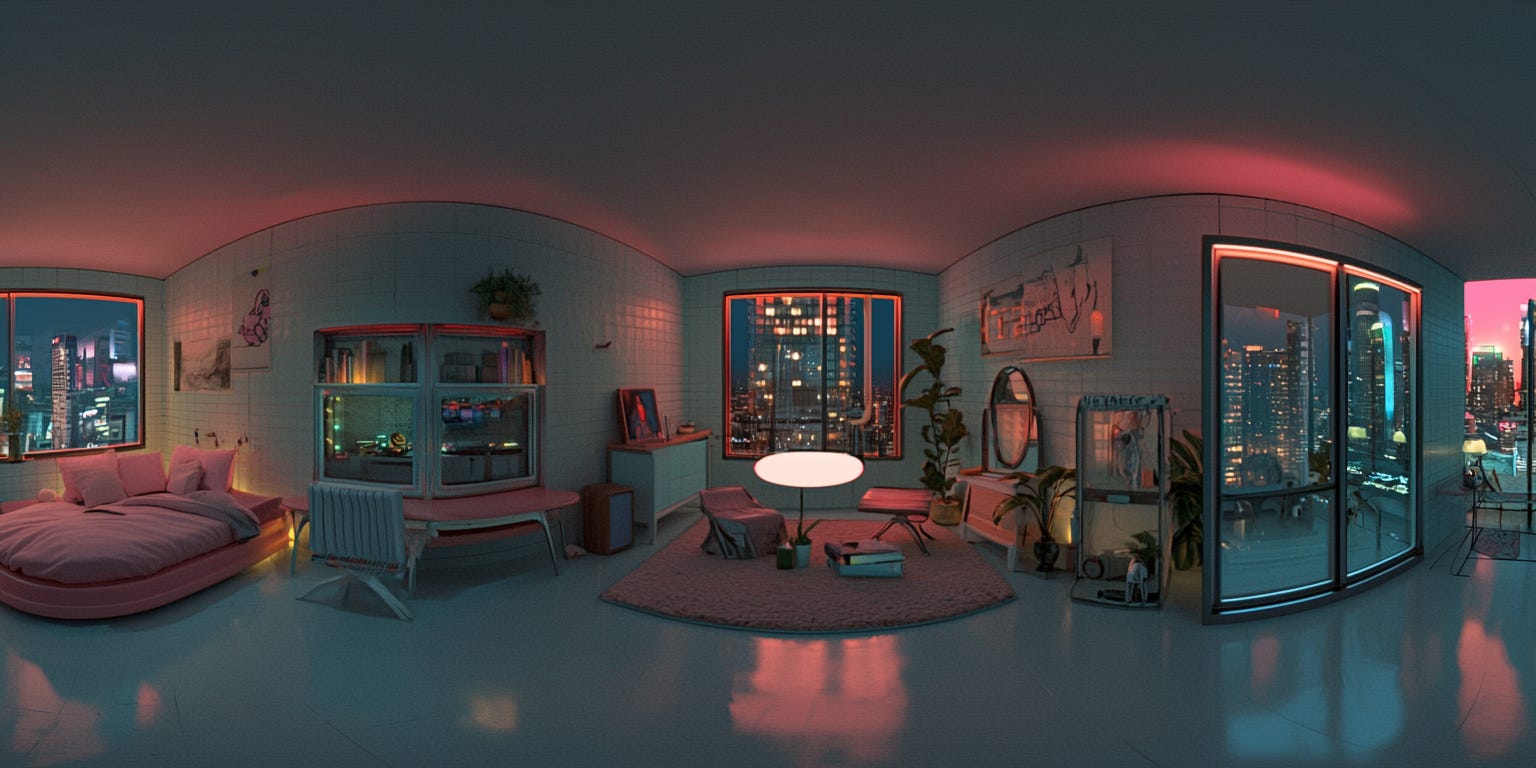
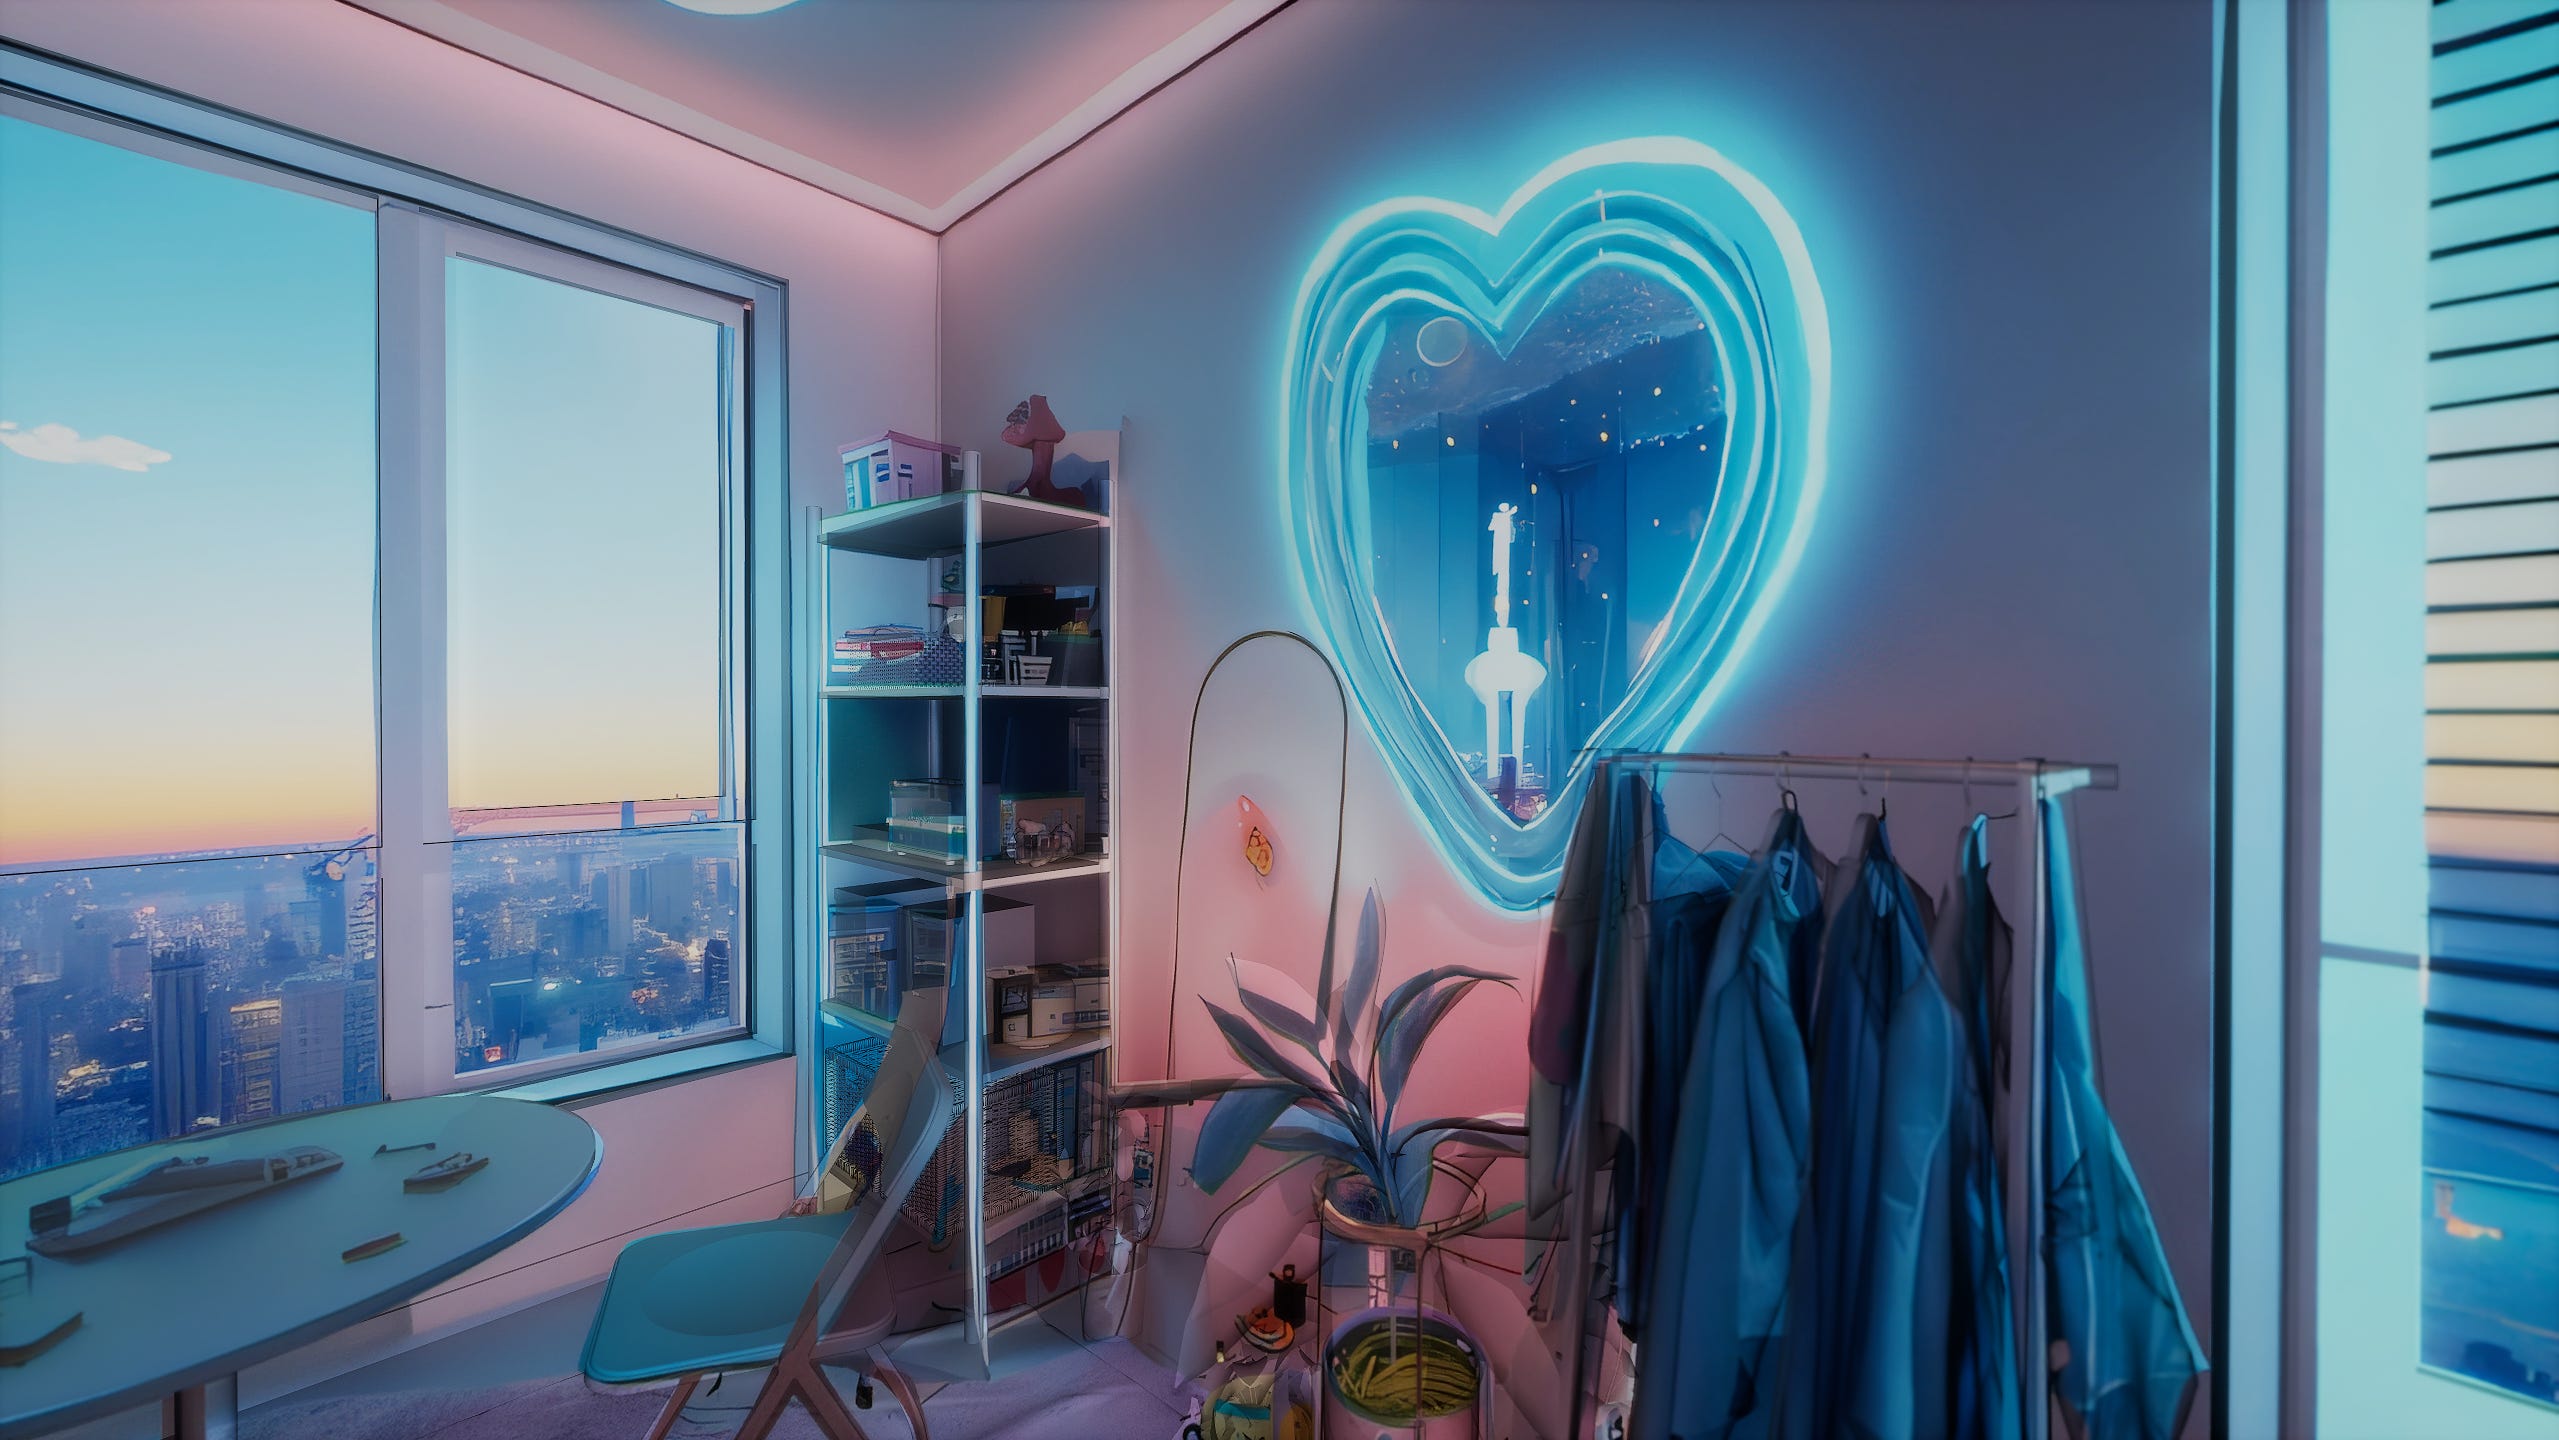
Here are a few results I was able to generate with ComfyUI.


Here are some of the prompts I used:
360-degree panoramic render of a dreamy retro-futuristic bedroom in a high-rise city apartment, soft pastel blue color palette, clean floor, ambient neon lighting in heart shapes on the walls, cozy bed with messy duvet, dual monitors displaying glowing heart symbols, modern bookshelves filled with books and art toys, large windows showing futuristic city skyline at sunset, pink rug on the floor, clean modern furniture with subtle curves, soft volumetric lighting, cinematic glow, ultra-detailed, rendered in Cinema 4D and Octane style, photoreal but slightly stylized, relaxing mood360-degree panoramic illustration of a dreamy pastel-colored room, synthwave anime style, flat cel-shaded rendering, clean outlines, cozy bed with messy duvet, monitor displaying glowing heart symbols, modern bookshelves filled with books and art toys, large windows showing Tokyo cityscape with moon in purple sky360-degree panoramic render of a bedroom in night time, late 80's retro wave aesthetic, dark blue, orange4. Spherical Projection into 3D
To bring the AI-generated variation back into Unreal Engine, I used a spherical projection method inspired by Dirk Teucher’s YouTube tutorial. This technique allowed me to project the 360 image onto the 3D scene as-is, without doing any UV work.


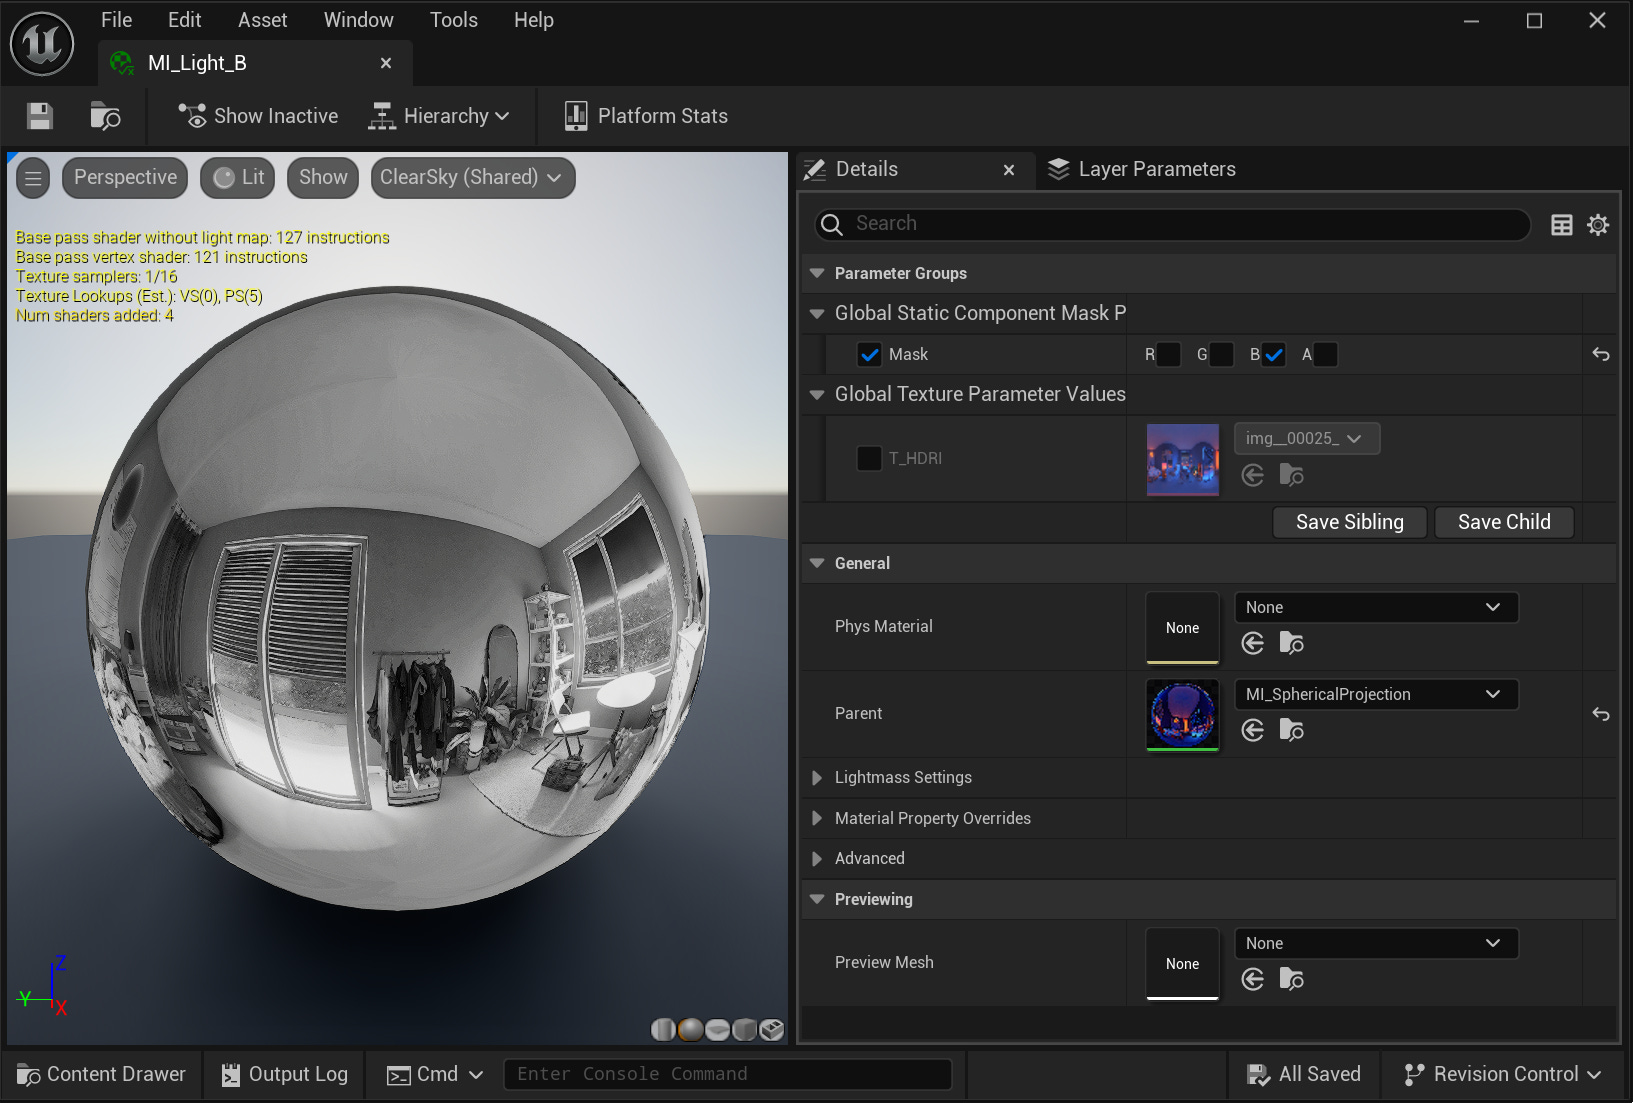

I created a Light Function material with a mask parameter and set up material instances for each RGB channel. Then, I placed three point lights at the same world position where I had rendered the 360 panorama. Each light was assigned a different material instance—one for red, one for green, and one for blue—corresponding to the RGB-separated texture slices.
Before and After
Below is a comparison of the original gray-shaded 3D scene and the projected version using the AI-enhanced 360 image.
Before
After

Limitations and Possibilities
Limitations
Camera movement isn’t supported. To avoid distortion, the viewer’s camera needs to stay exactly at the projection point. You can see in the video below how the projection breaks when the camera moves.
What’s Promising
Instant concept validation
I didn’t have to imagine how the 2D concept might look in 3D—it was applied directly to the space, allowing fast lookdev decisions.
Surprisingly good lighting results
The AI-generated 360 image contained texture, ambient occlusion, and baked lighting all in one. I didn’t expect the baked lighting to feel so natural—but it did, and that was fascinating.
Fast iteration within fixed structure
The same room could be reimagined with multiple styles, demonstrating that GenAI can work effectively within a defined scope.
Unexpected inspiration from 2D GenAI
With the right prompts and constraints, 2D GenAI could generate ideas I never would’ve thought of myself.
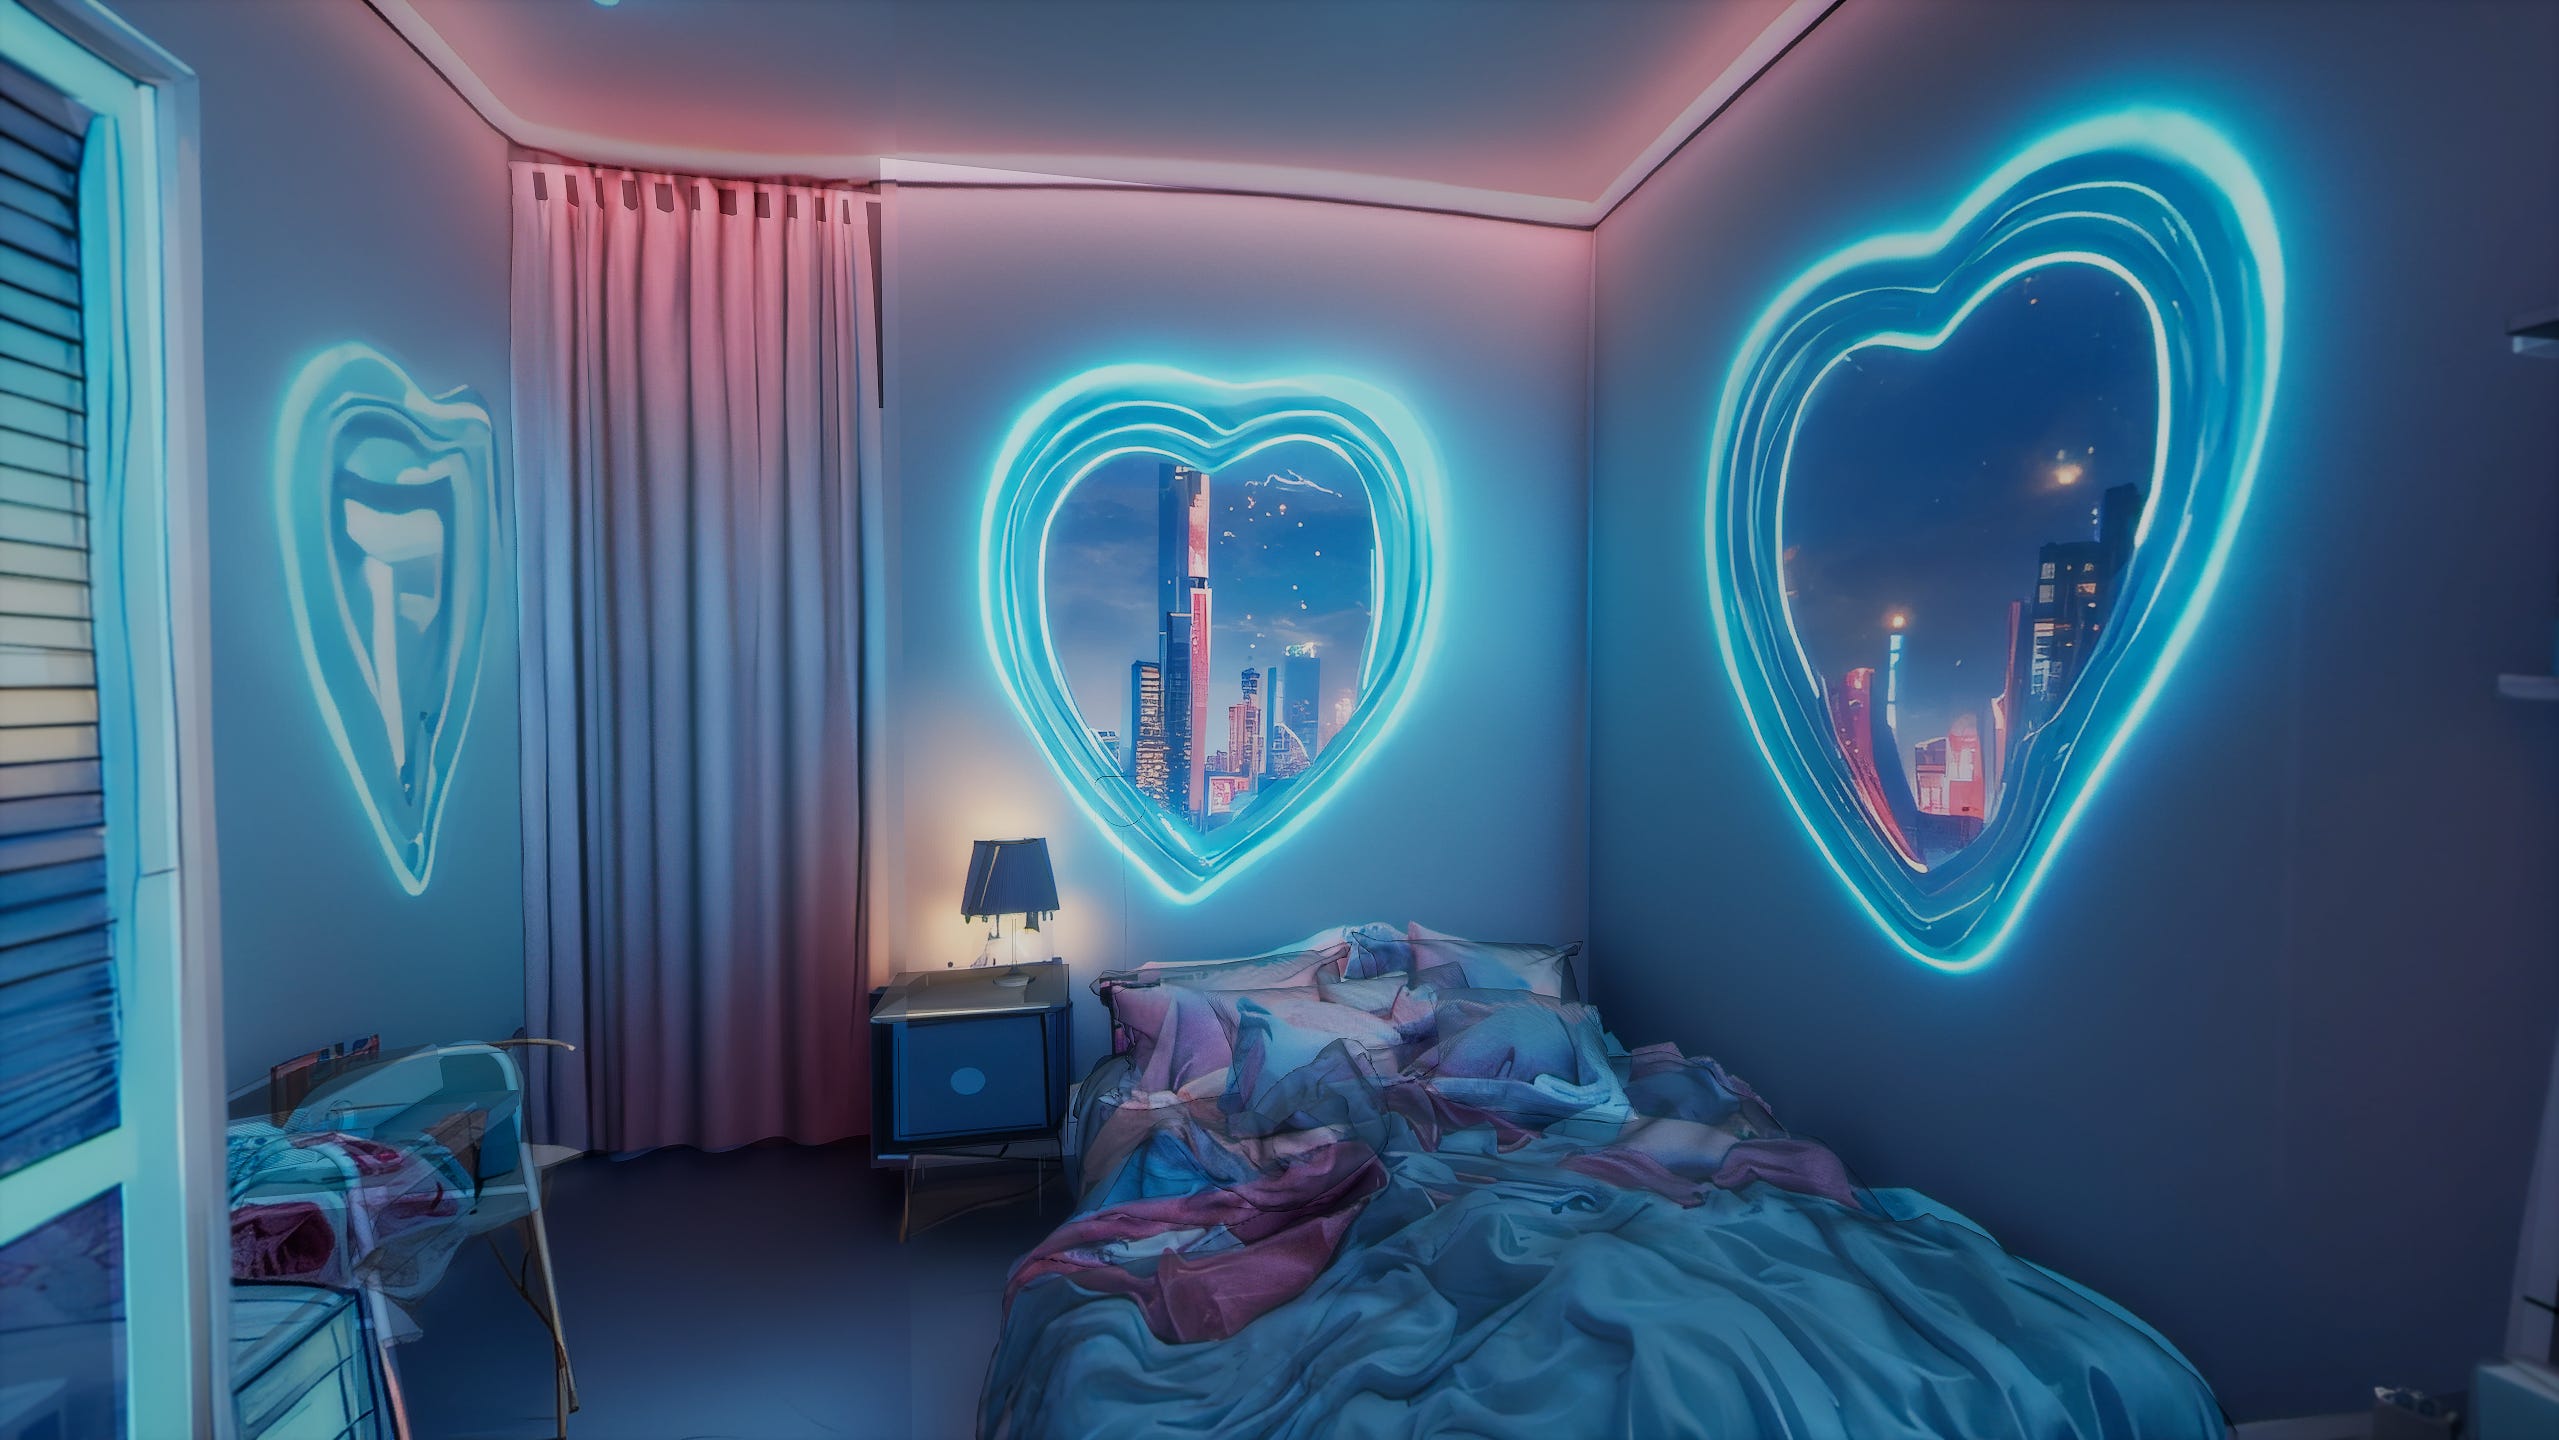

For example, the glowing heart-shaped wormhole windows, I thought they were totally random but so cool. AI just bluntly putting windows where I would suppose we shouldn't is hilarious.
For these results, I was using an LLM to extract prompts from the style transfer image, which was an illustration of a street in Japan. The prompt included "overhead power lines," "street," and "Tokyo alleyway vibes," which led to the generation of telephone poles and city building skylines on the ceiling. This was an accident, but I thought it was actually pretty cool when applied to the 3D scene, seeing building skylines through the ceiling. It almost made me think about a room that doesn't have a ceiling and is just floating in the middle of Tokyo alleyways. It's almost like AI challenges your stereotype: "Why does there have to be a solid ceiling? What if we just don't?"
What’s next
I really enjoyed testing this. However, I am aware that this workflow needs improvement to be production-ready. My next plans are:
ComfyUI: Try tiled diffusion and start with 4K generation to apply ControlNet more accurately.
ComfyUI: Test different combinations of ControlNet for tighter accuracy, and explore integrating refiner to get cleaner results.
ID map test: Render an ID map version of the 360 base scene and use it as an inpainting mask in ComfyUI.
Lighting scenario & consistency test: Try generating one AI-based 360 image, then run IC-Relight to explore different lighting design ideas—daytime, sunset, night, etc.
This experiment was a small step toward integrating generative AI into 3D environment workflows in a practical, design-driven way. Thanks for reading. I hope you found something inspiring or helpful in this post. Feel free to reach out if you have thoughts or tips!
Hi, Yon. I tried to download your Workflow but the link only takes me to an image of one of the renders. Is it possible to fix the link or send me the workflow?
Thanks,
Bryan
I also reached out to you on LinkedIn to connect.